My 1860’s Corset (With Measurements)
Dear Venturers,
I have one literal day to complete a corset. Sounds crazy, right??
I was looking for how to make one. There’s lots of videos and stuff, but no patterns! Unless, of course, you buy one.
So here is how to make one yourself!
(for free! ;))
NOTE: this is for one half of a corset! Not for both sides!
1. Choose your fabric. I would recommend a twin sheet for this one. Maybe 2-4 king-sized pillowcases. I used a white cotton sateen which I will also double-layer.
2. Cut out the main piece. These are the measurements:


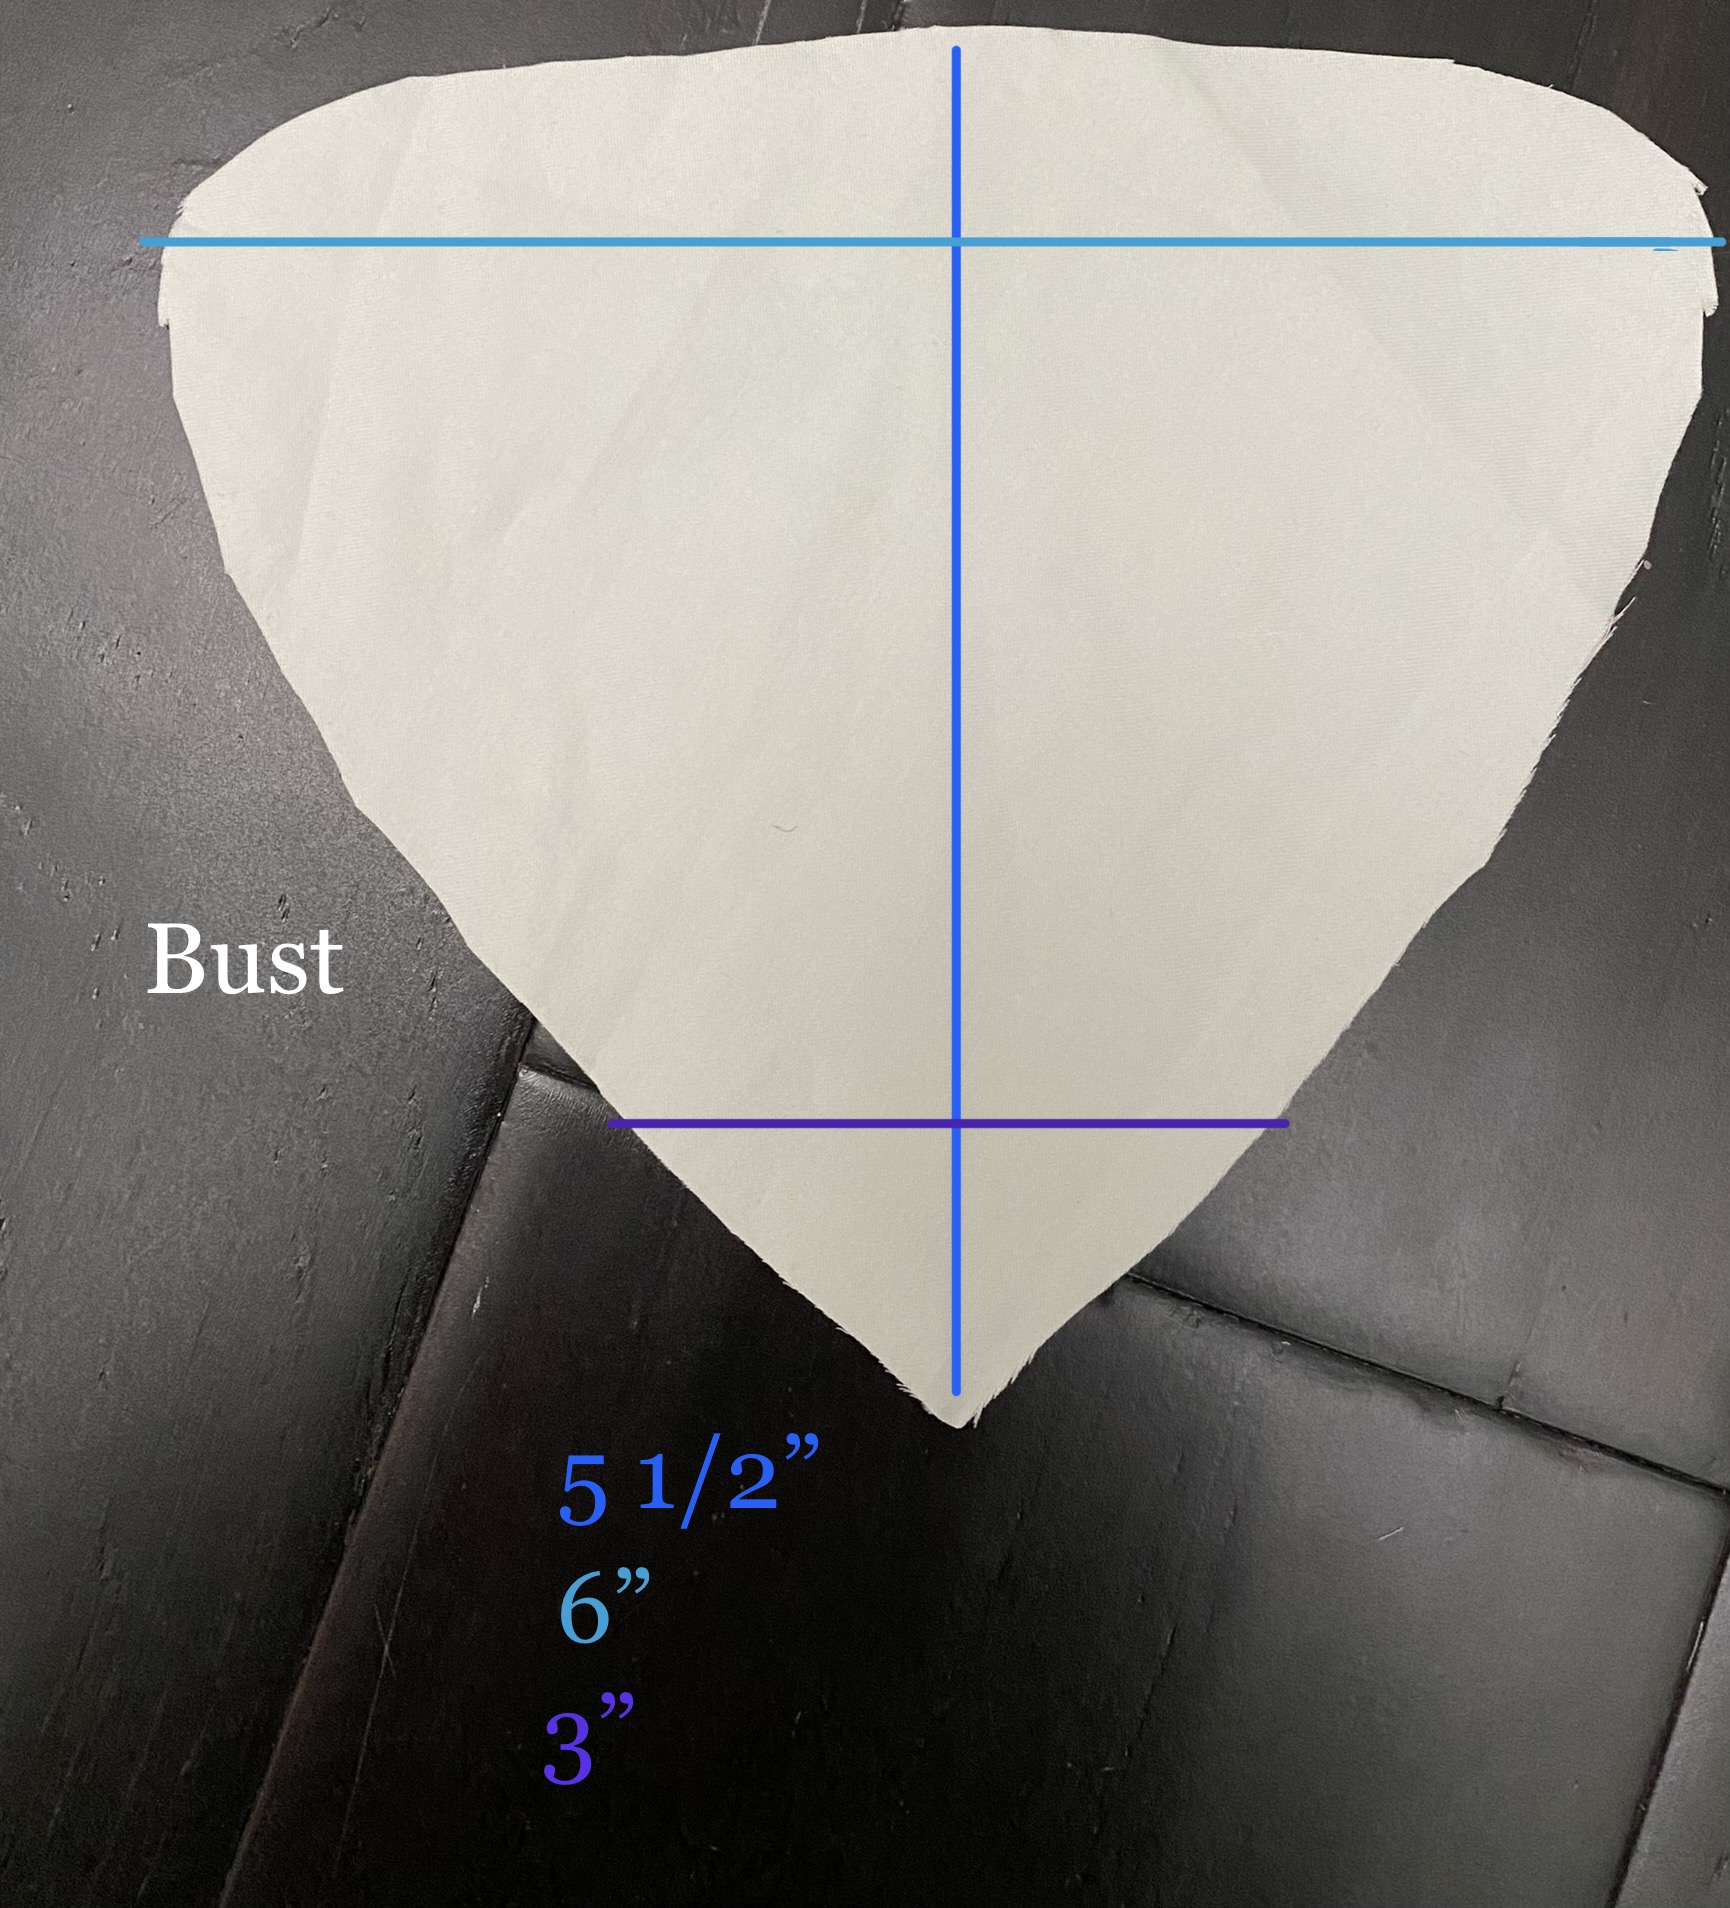
3. Next you’ll need a triangular piece to fit in the V-shaped hole for the bust. The larger the V and triangle, the more bust you have. Here’s mine:
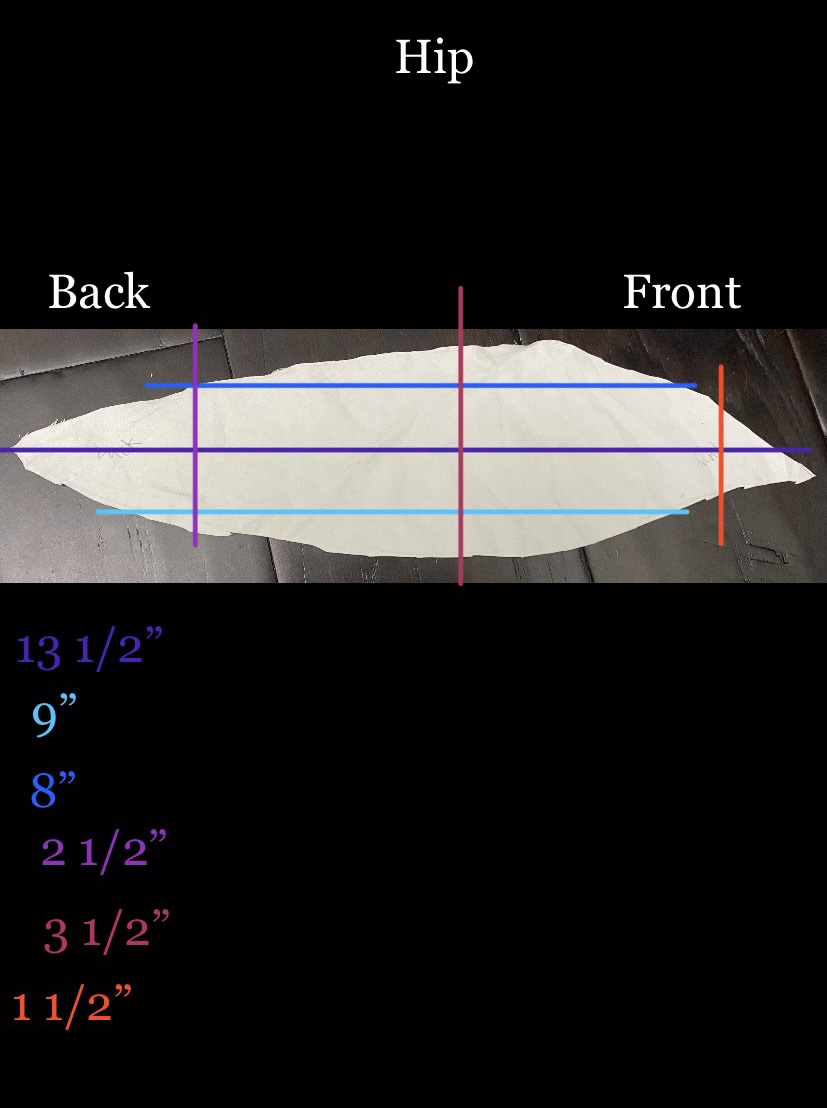
4. Add in the hip piece. These are the measurements. This part was very tricky for me!
5. Cut a few slits in the sides. Do this by cutting a straight line wherever you have extra fabric hanging, and then curve in each side of the slit by just a little bit. Then sew the slit together again. I did this once in the front, and once in the back.
6. Add in boning channels and boning (and some cording if you want!).
7. In all you’ll need four of these. Two for each side so that it has two layers.
8. For closure, mine has a busk in the front and has no separation in the back. Here’s a helpful link on how to insert the busk:
http://sidneyeileen.com/sewing-2/sewing/corset-making-tasks/busk/
NOTE: This is just the basic shapes. Once you’ve cut out the prices and pinned them together, you’ll probably want to make adjustments and such. I brought up the hip a bit, took in the waist some (as I mentioned earlier), etc.
I know this might not be THE MOST historically accurate corset EVER, but it works well enough for me right now. ;)
As always, I wish you good luck in your ventures, and hope you can make some sense of my ramblings!
I’ll update this picture as the project progresses…


Comments
Post a Comment
How does this relate to you? What did you think?